How to Edit Email Templates in MaxCommerce
How to Edit Email Templates in MaxCommerce
Overview
The MaxCommerce Email Template Editor allows you to customise the content and appearance of automated emails sent from your store, including order confirmations, dispatch notifications, invoices, and more. This guide walks you through how to find, edit, preview, and publish email templates.
Step 1: Navigate to Settings
Log in to your MaxCommerce admin panel. Click Settings in the top navigation bar. Then expand the second section under General Settings (this will be your company name, in this example GT)
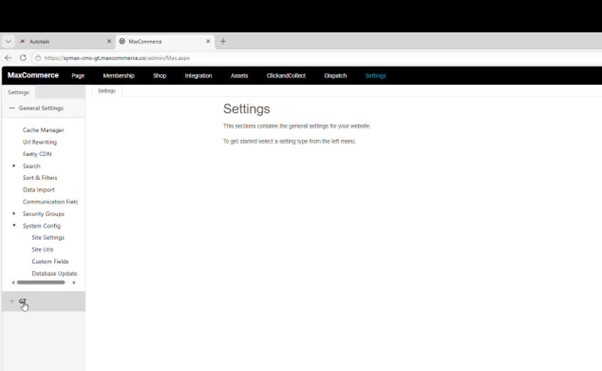
Step 2: Open the Email Editor
Then click Email Editor, this will display the full list of available email templates.
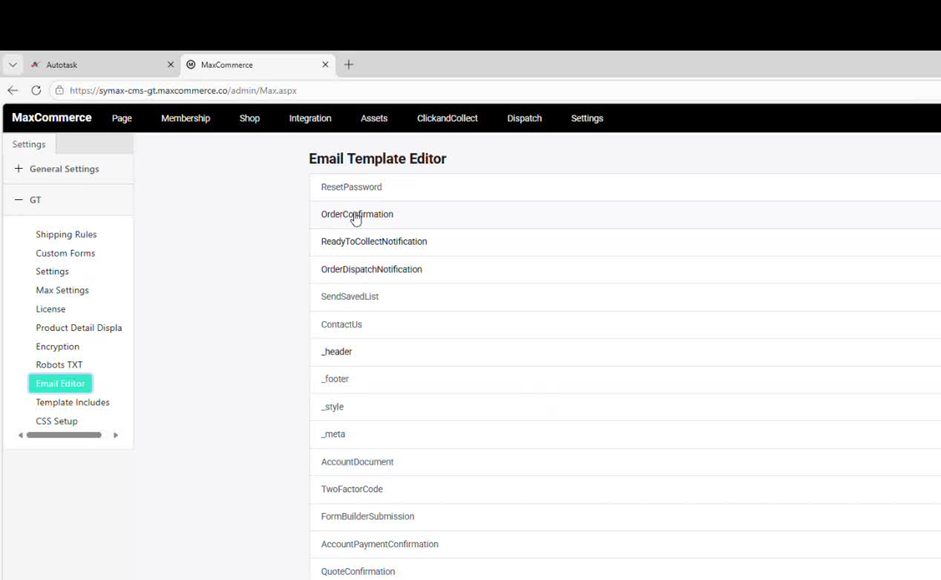
Note: You will see templates for all system emails including OrderConfirmation (invoice), ReadyToCollectNotification, OrderDispatchNotification, AccountDocumen, and more. The _header and _footer templates control elements shared across all emails.
Step 3: Select and Edit a Template
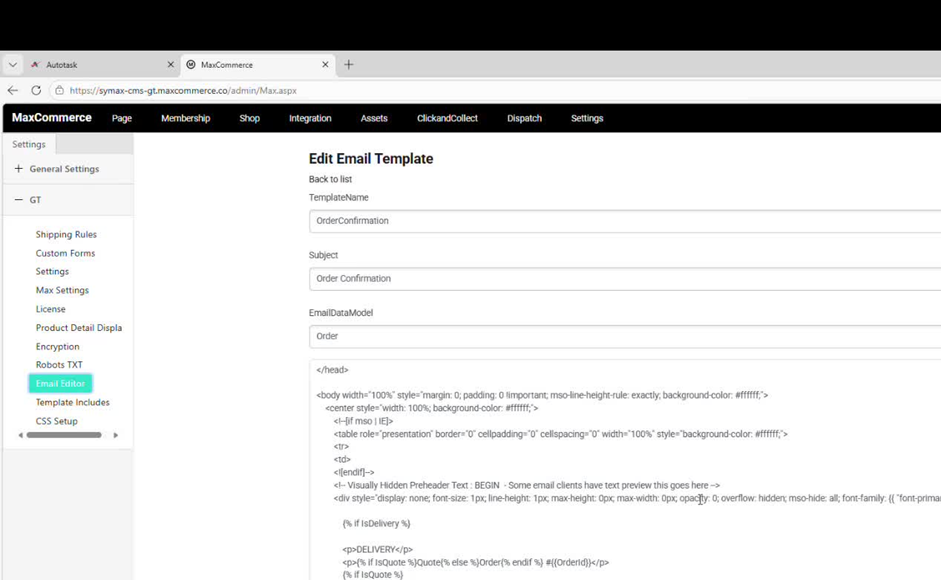
Click the name of the template you want to edit. This opens the template editor, which contains:
1. TemplateName — the internal identifier (read only)
2. Subject — the subject line the customer sees
3. HTML code editor — the full HTML content of the email
To update wording, find the relevant text in the HTML editor and type your changes directly. For example, to change a greeting or update a body paragraph, locate the text between the HTML tags and replace it.
(Tip: using ChatGPT to ask it to change what you want specifically in the HTML code is a fast and helpful way to make quick changes)
Step 4: Preview the Template
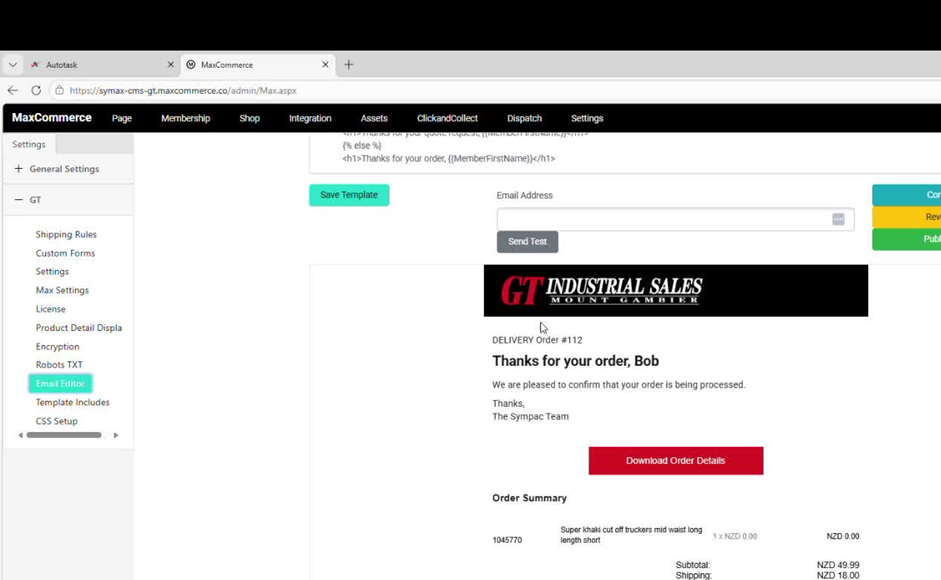
A live preview of the email renders below the HTML editor as you scroll down. This shows how the email will appear to customers, including the header logo and all content.
Step 5: Send a Test Email
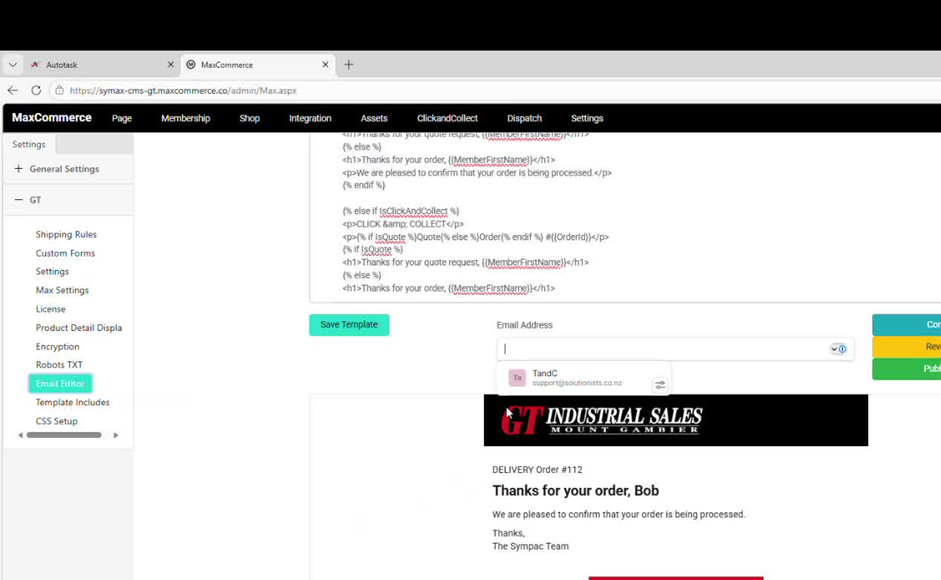
Before publishing, always send a test to verify the email looks correct.
1. Enter an email address in the Email Address field below the editor.
2. Click Send Test.
3. Check your inbox to review how the email renders.
Step 6: Save and Publish
There are three important buttons at the bottom of the editor:
1. Save Template — saves your changes as a draft. The live version is not affected yet. (TEAL BUTTON)
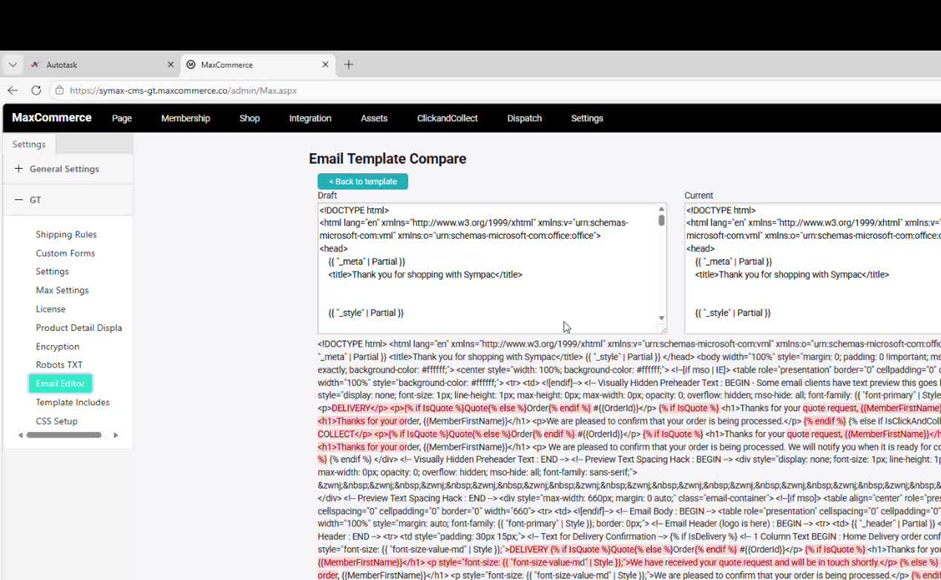
2. Compare to Live — shows a side-by-side diff between your draft and the currently live version. Use this to double-check what you are about to change, shown in the image below. (BLUE BUTTON)
3. Publish Template — makes your changes live. Customers will receive the updated email from this point forward. (GREEN BUTTON)
Note: Always click Save Template first, then use Compare to Live to review your changes, and finally click Publish Template to go live. Simply saving does not make changes visible to customers.
Editing the Header and Footer (All Emails)
The _header and _footer templates control elements that appear in every email sent from your store. If you want to update the logo or branding that appears across all emails, edit these templates rather than each individual one.
To edit the header:
1. From the Email Template Editor list, click _header.
2. The header HTML contains an <img> tag with the logo image URL. Update the src attribute to point to your new logo if needed.
3. Save, check via Compare to Live, and then Publish Template
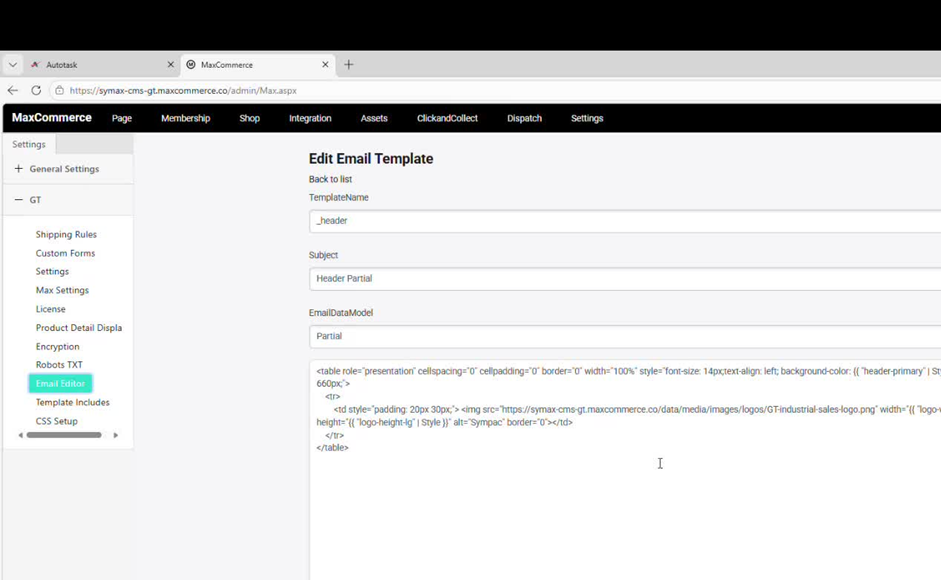
Header template (_header) — edit the logo image URL and header background colour here
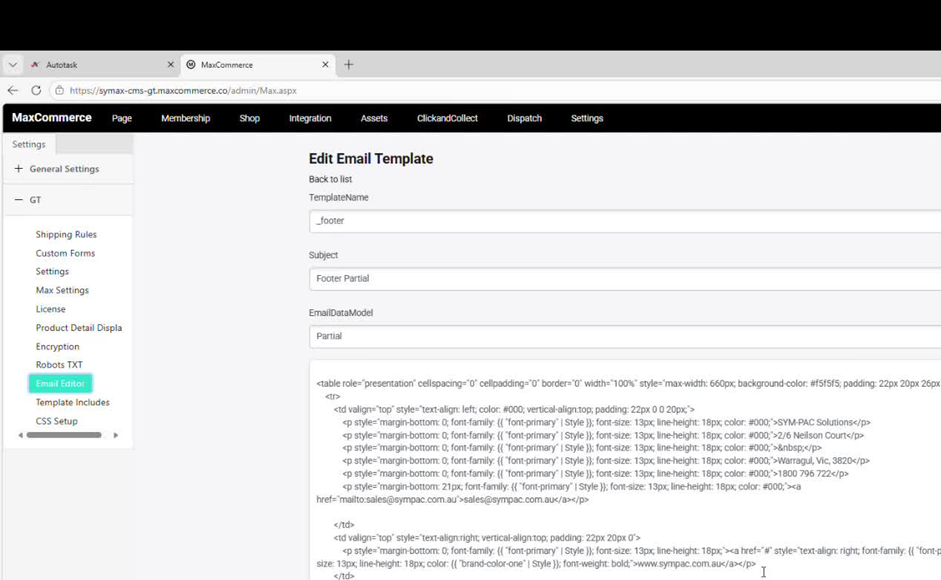
Footer template (_footer) — update business name, address, phone, and website link here
Note: Changes to _header and _footer apply to all emails. Publishing either of these templates will update the branding across your entire email suite.
Template Quick Reference
Template Name | When It Is Sent |
OrderConfirmation | Sent to the customer when an order is placed |
ReadyToCollectNotification | Sent when a click-and-collect order is ready |
OrderDispatchNotification | Sent when an order is dispatched |
AccountDocument | Invoice email sent to the customer |
AccountPaymentConfirmation | Sent when a payment is confirmed |
QuoteConfirmation | Sent when a quote is submitted |
ResetPassword | Sent when a customer requests a password reset |
_header | Shared header used in all emails (logo, background) |
_footer | Shared footer used in all emails (address, contact details) |
Tips and Best Practices
- Only edit plain text content if you are not familiar with HTML. Changing the code structure can break the template layout.
- Always use Send Test before publishing to confirm how the email looks in an inbox.
- Use Compare to Live to catch any unintended changes before going live.
- If you need to undo your changes, click Revert Template to restore the last published version.
- If you need help with HTML changes or branding updates, contact the MaxCommerce support team.