Managing Sales Representatives
Managing Sales Representatives in MaxCommerce
This guide explains how to set up a Sales Representative in MaxCommerce and how to use the “shop as customer” functionality.
Adding a Sales Representative
- Before adding a Sales Representative, ensure that the person already exists as a user in the CMS, as only existing users can be assigned as Sales Reps.
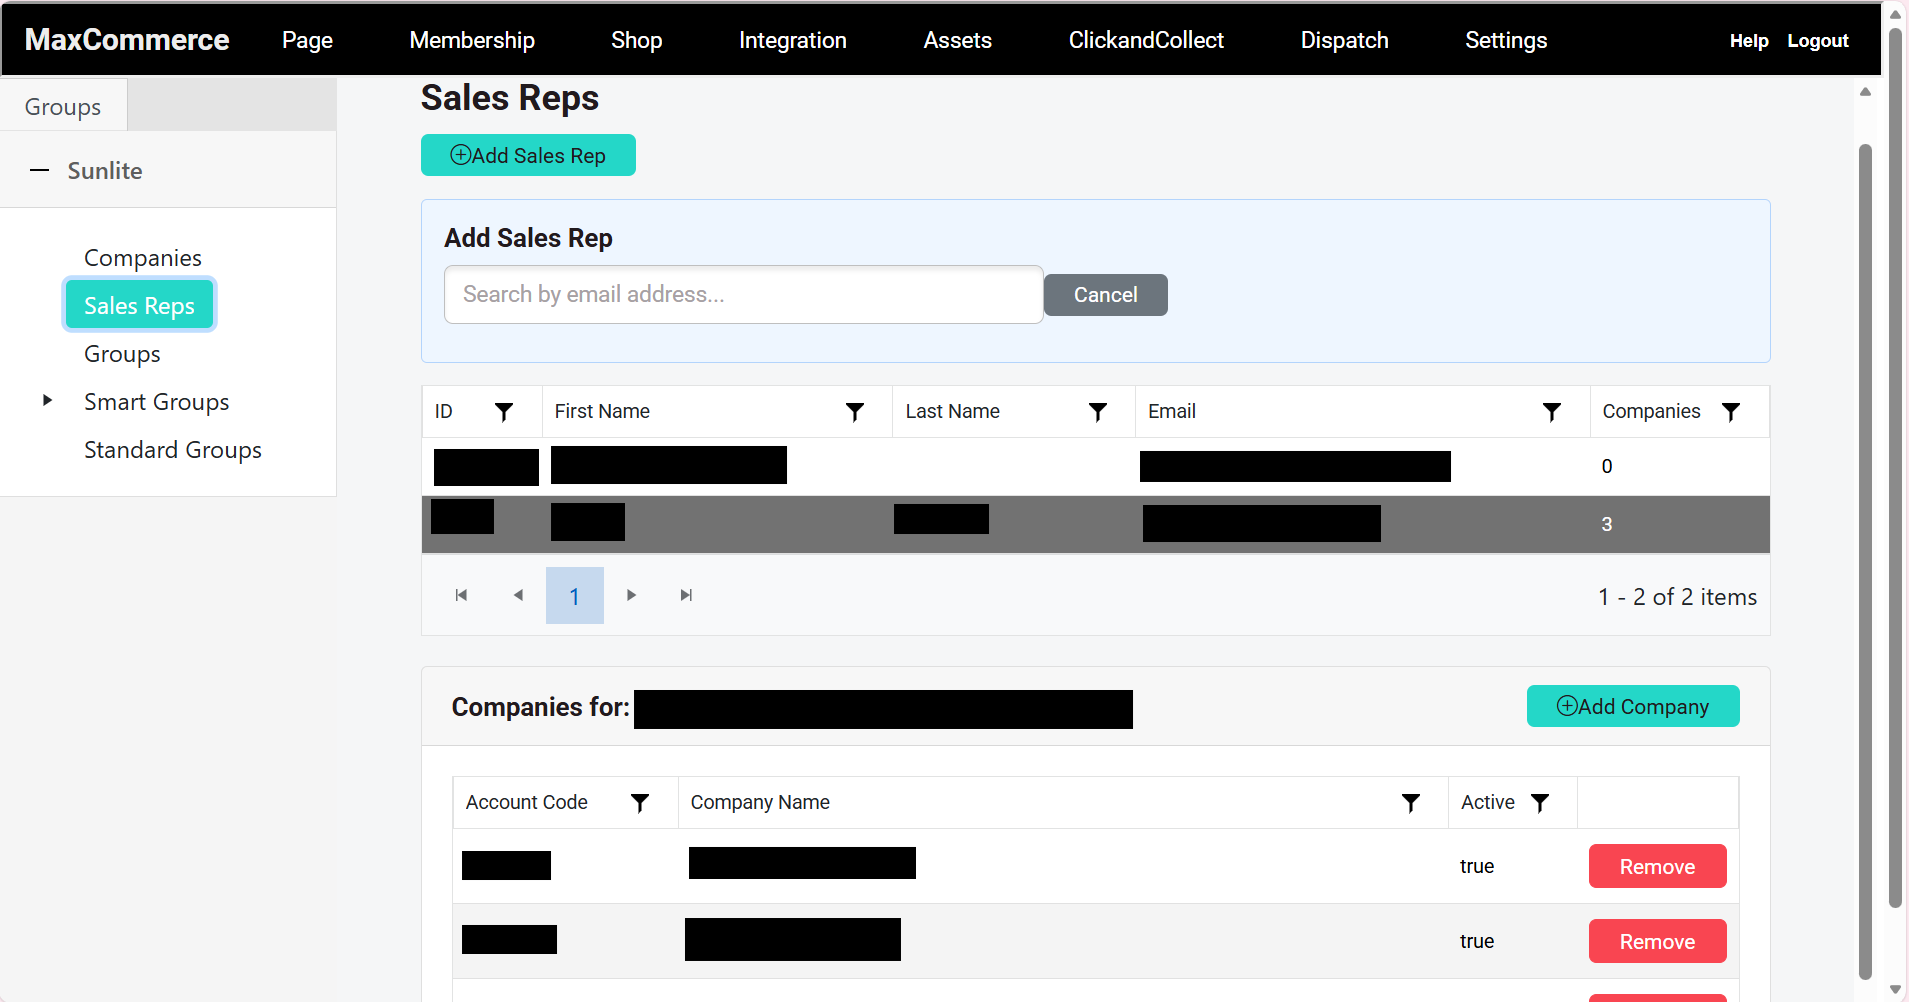
- Navigate to CMS > Memberships, then select the Sales Rep tab, where you will manage all Sales Representative settings.
- Click Add Sales Rep, then select the user you would like to assign as a Sales Representative from the available list.
- Assign one or more companies (debtor accounts) to the Sales Representative, depending on how their access should be controlled.
- If you do not assign a company, the Sales Representative will be able to access and act on behalf of any customer account in the system.
- If you assign specific companies, the Sales Representative will be restricted to only act on behalf of customers within those assigned companies.
- Ensure that the selected company is a valid debtor company with users linked to it, as Sales Representatives operate by impersonating users within these accounts.
Accessing Sales Rep Mode (Shop as Customer)
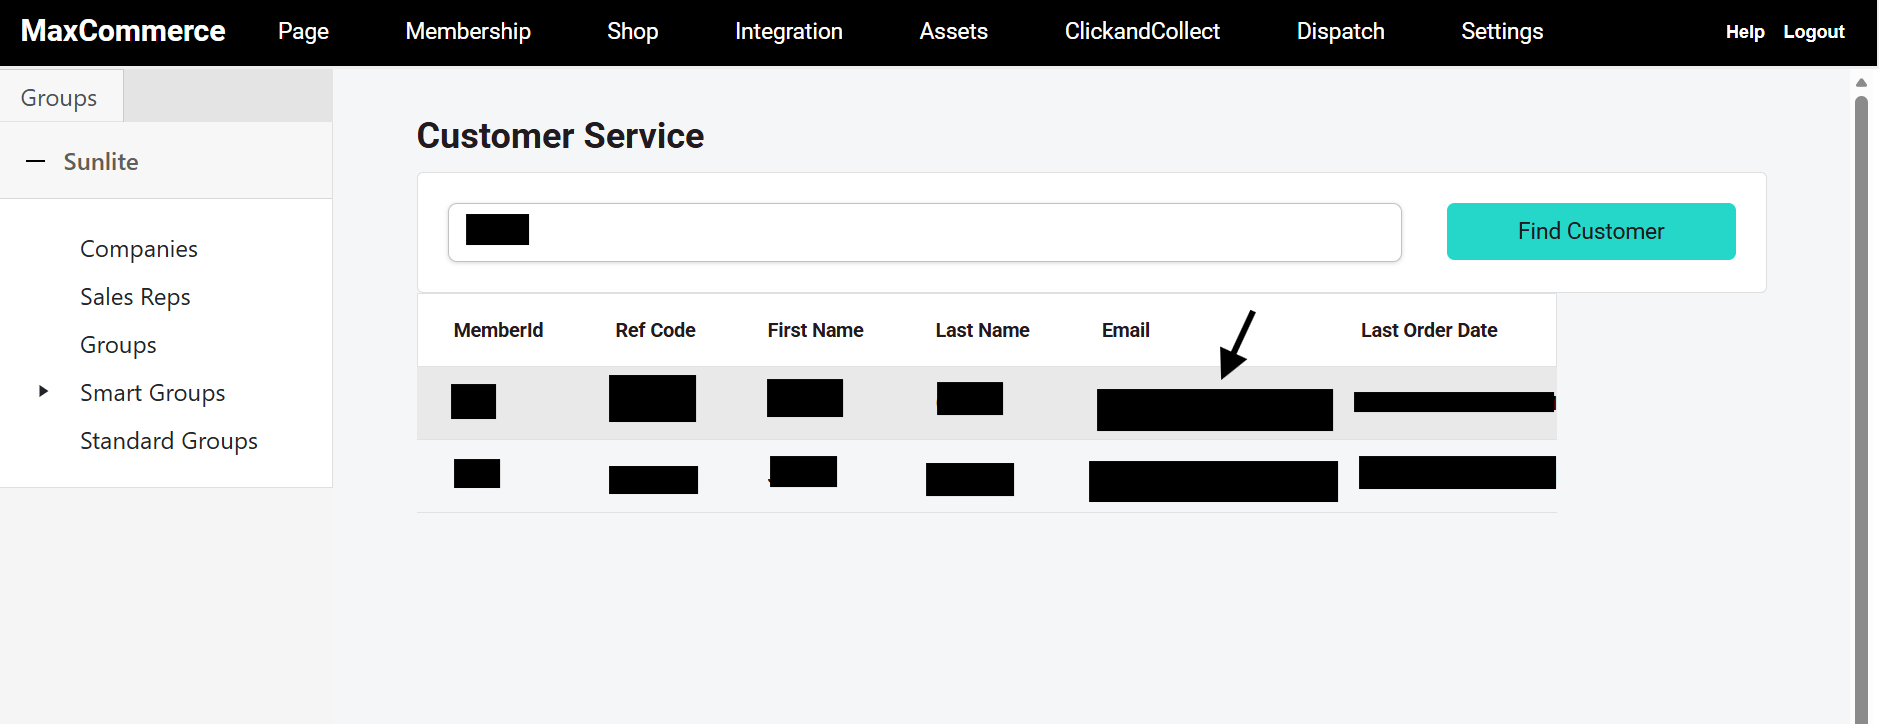
- After adding the Sales Representative, return to the main Memberships tab and refresh the page to access the Customer Service search bar.
- Use the search bar to locate the Sales Representative user by name, then click on their email address to open their member details.
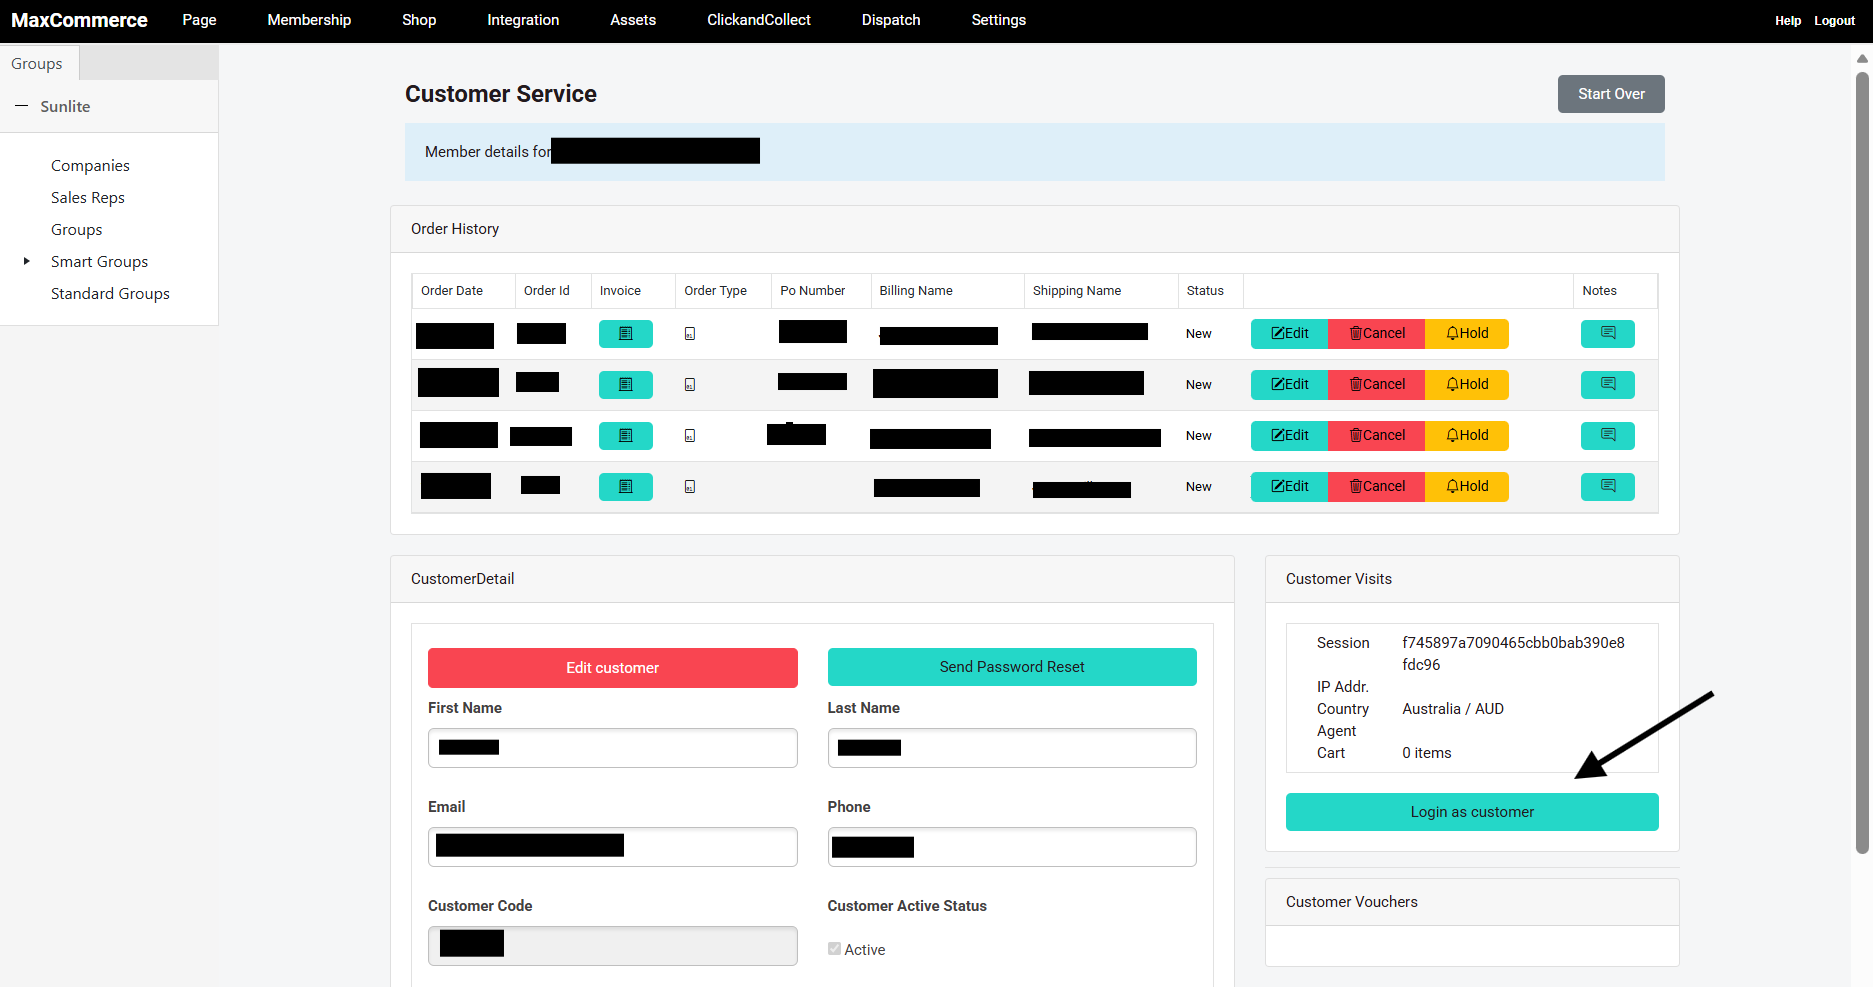
- Within the member details screen, locate and click the “Login as Customer” button to initiate Sales Rep mode.
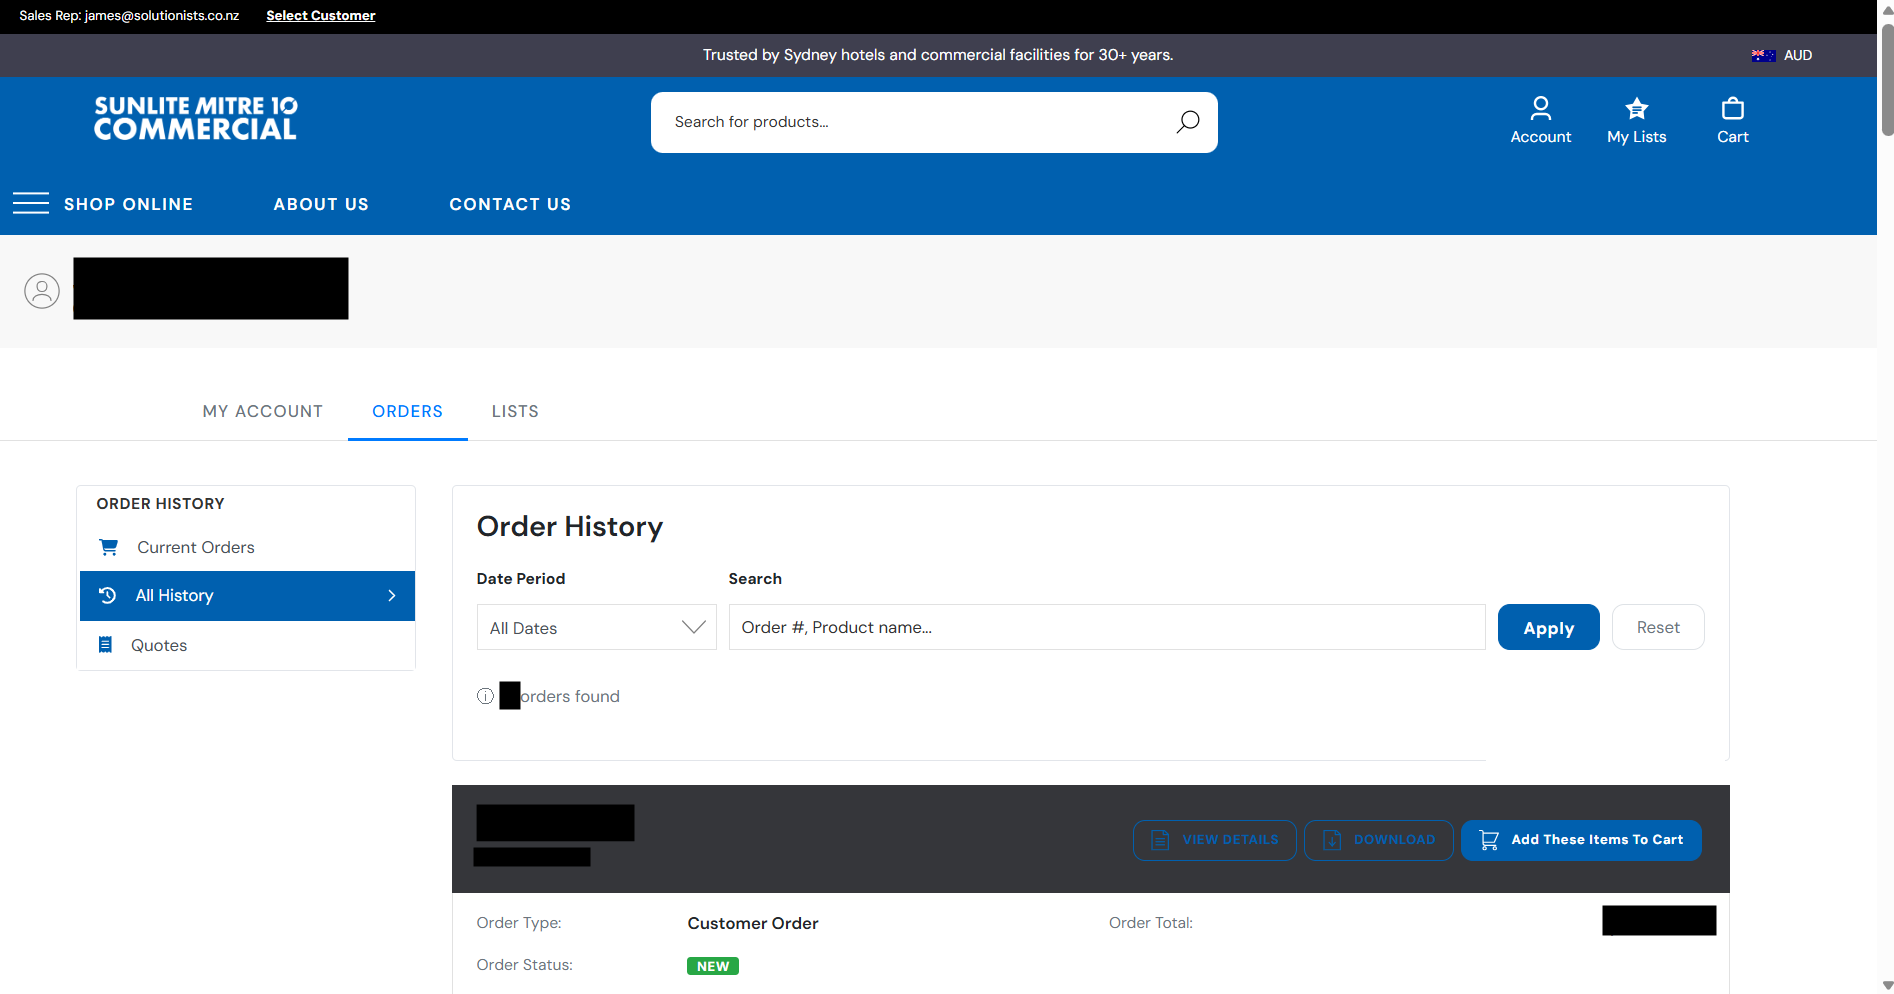
- This will open the website in a Sales Representative view, where a message banner at the top of the screen confirms that you are operating in Sales Rep mode.
Shopping as a Customer (Impersonation)
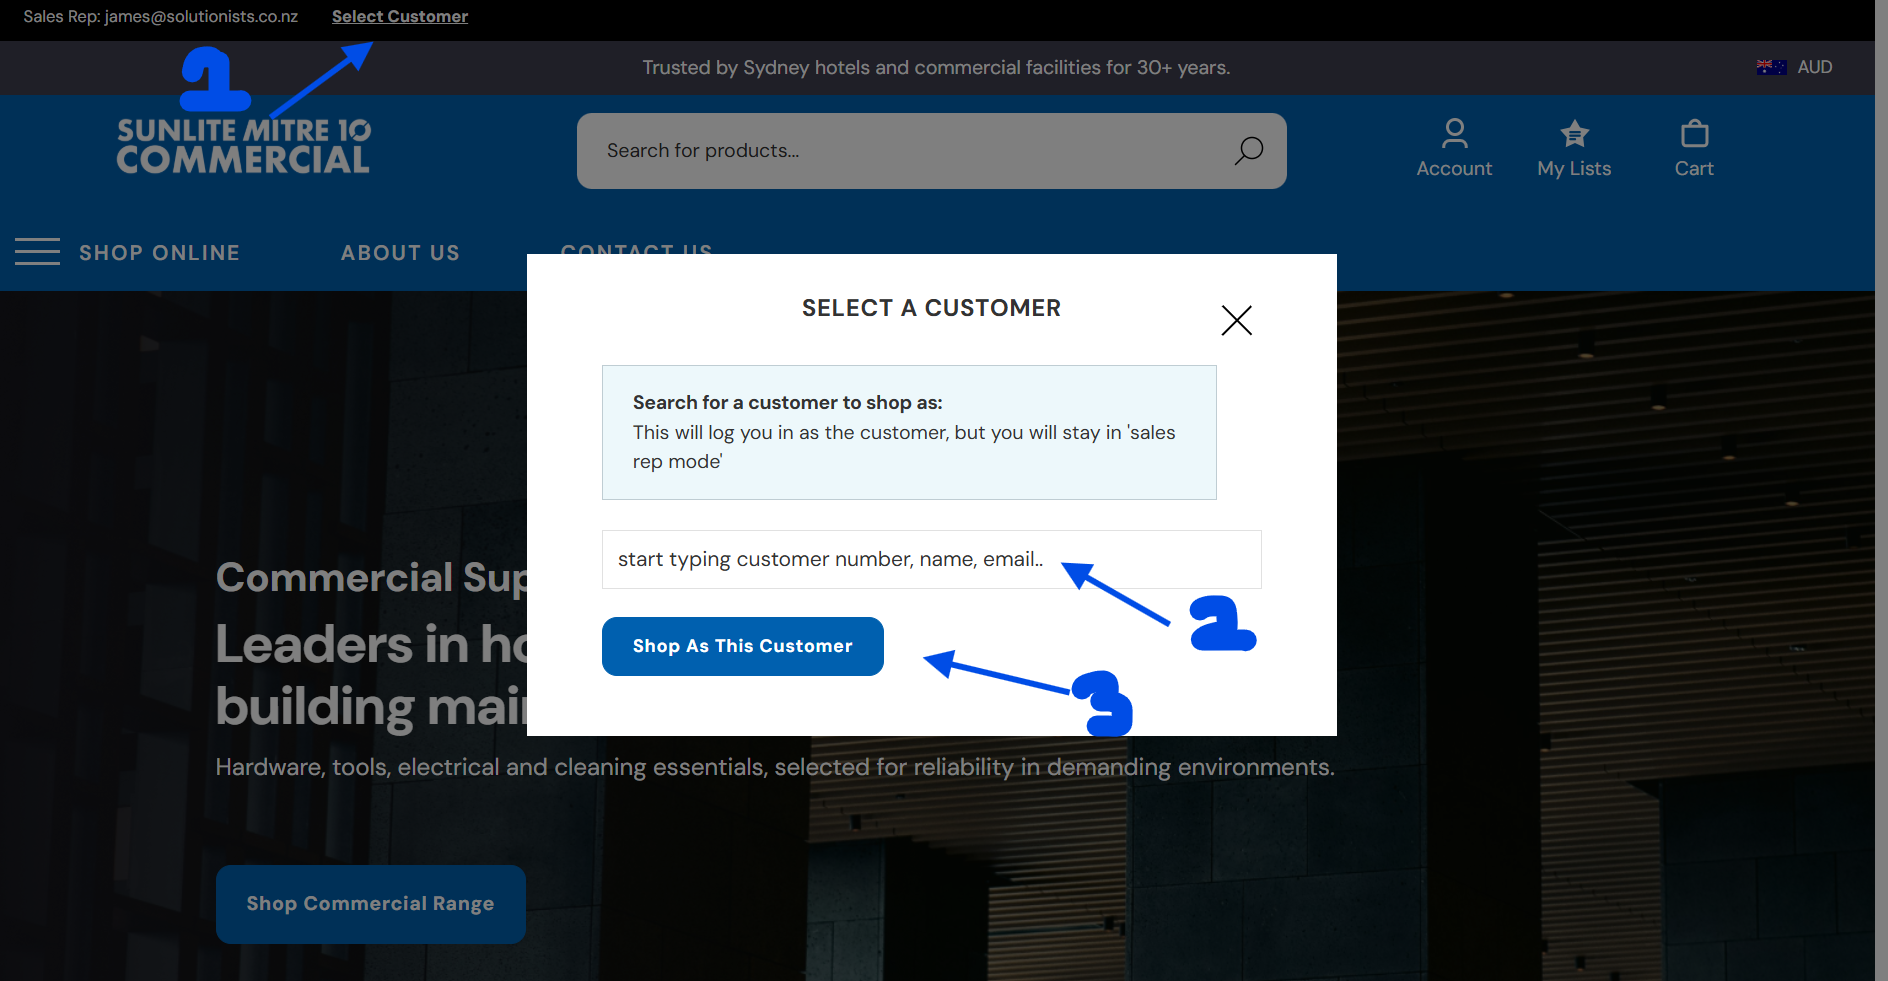
- In Sales Rep mode, click the “Select Customer” button to begin choosing a customer account to act on behalf of.
- Use the search field labelled “Search for a customer to shop as” to find the required customer or user.
- Select the appropriate customer, then click “Shop as this customer” to enter their account.
- Once selected, you will be logged in as that customer while still remaining in Sales Rep mode, allowing you to perform actions on their behalf.
What Sales Reps Can Access
- While shopping as a customer, the Sales Representative has access to key account features, including:
- Viewing the customer’s online order history
- Accessing account details and information
- Viewing and managing Favourites (saved items)
- Accessing and updating addresses
- Reviewing general account activity
- This functionality allows Sales Representatives to assist customers with orders, account management, and general enquiries directly within the website.