Managing Admin Access in MaxCommerce
Overview:
Admin access to the MaxCommerce CMS is managed via email address and controlled through security groups. These groups define what areas a member can access and update.
This guide explains:
- How to check if a member exists
- How to grant or revoke admin access
- How to add a new admin (either by self-signup or CMS-created)
- Best practices for managing shared or outgoing user access
Note: Security groups can be found under CMS > Settings > Security Groups. Do not remove any Solutionists accounts from these groups. Removing a member from a security group only revokes their CMS access – the account remains in the system for order and historical reference purposes.
1. Understand Security Groups
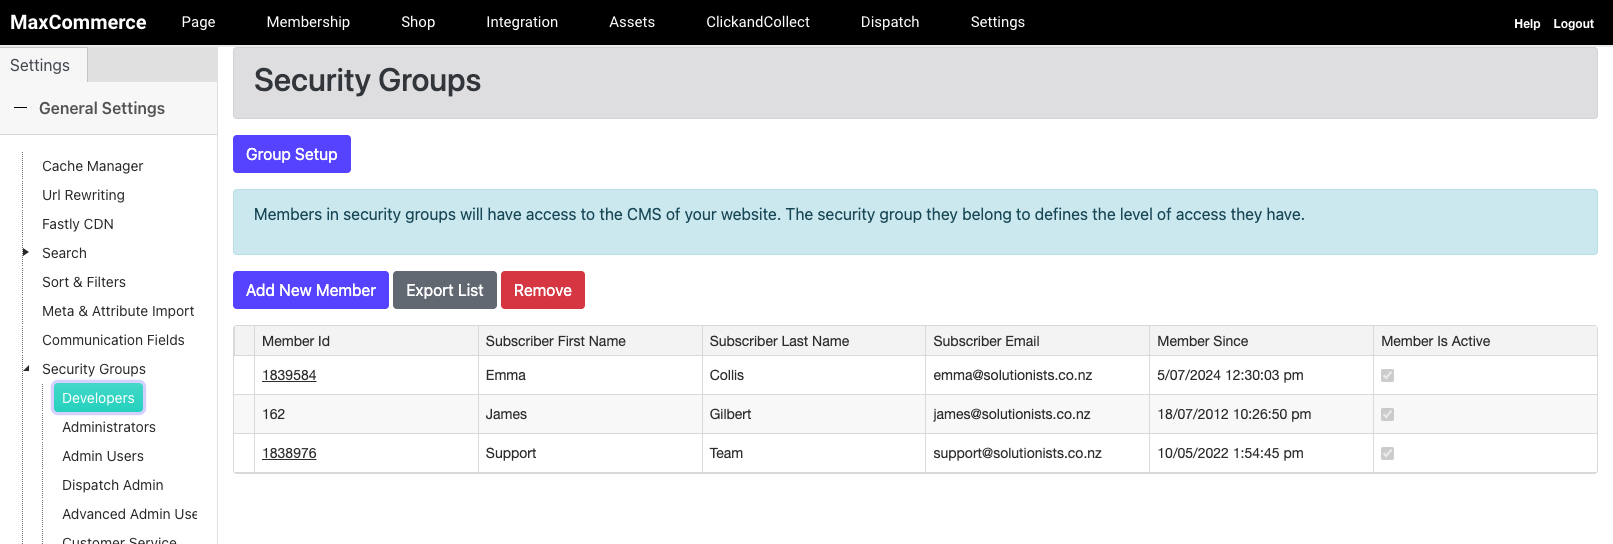
- Go to CMS > Settings > Security Groups
- Review your groups and their members
- Most admins will belong to:
- Administrators
- Developers
You may see group names like Admin Users depending on your version of MaxCommerce.
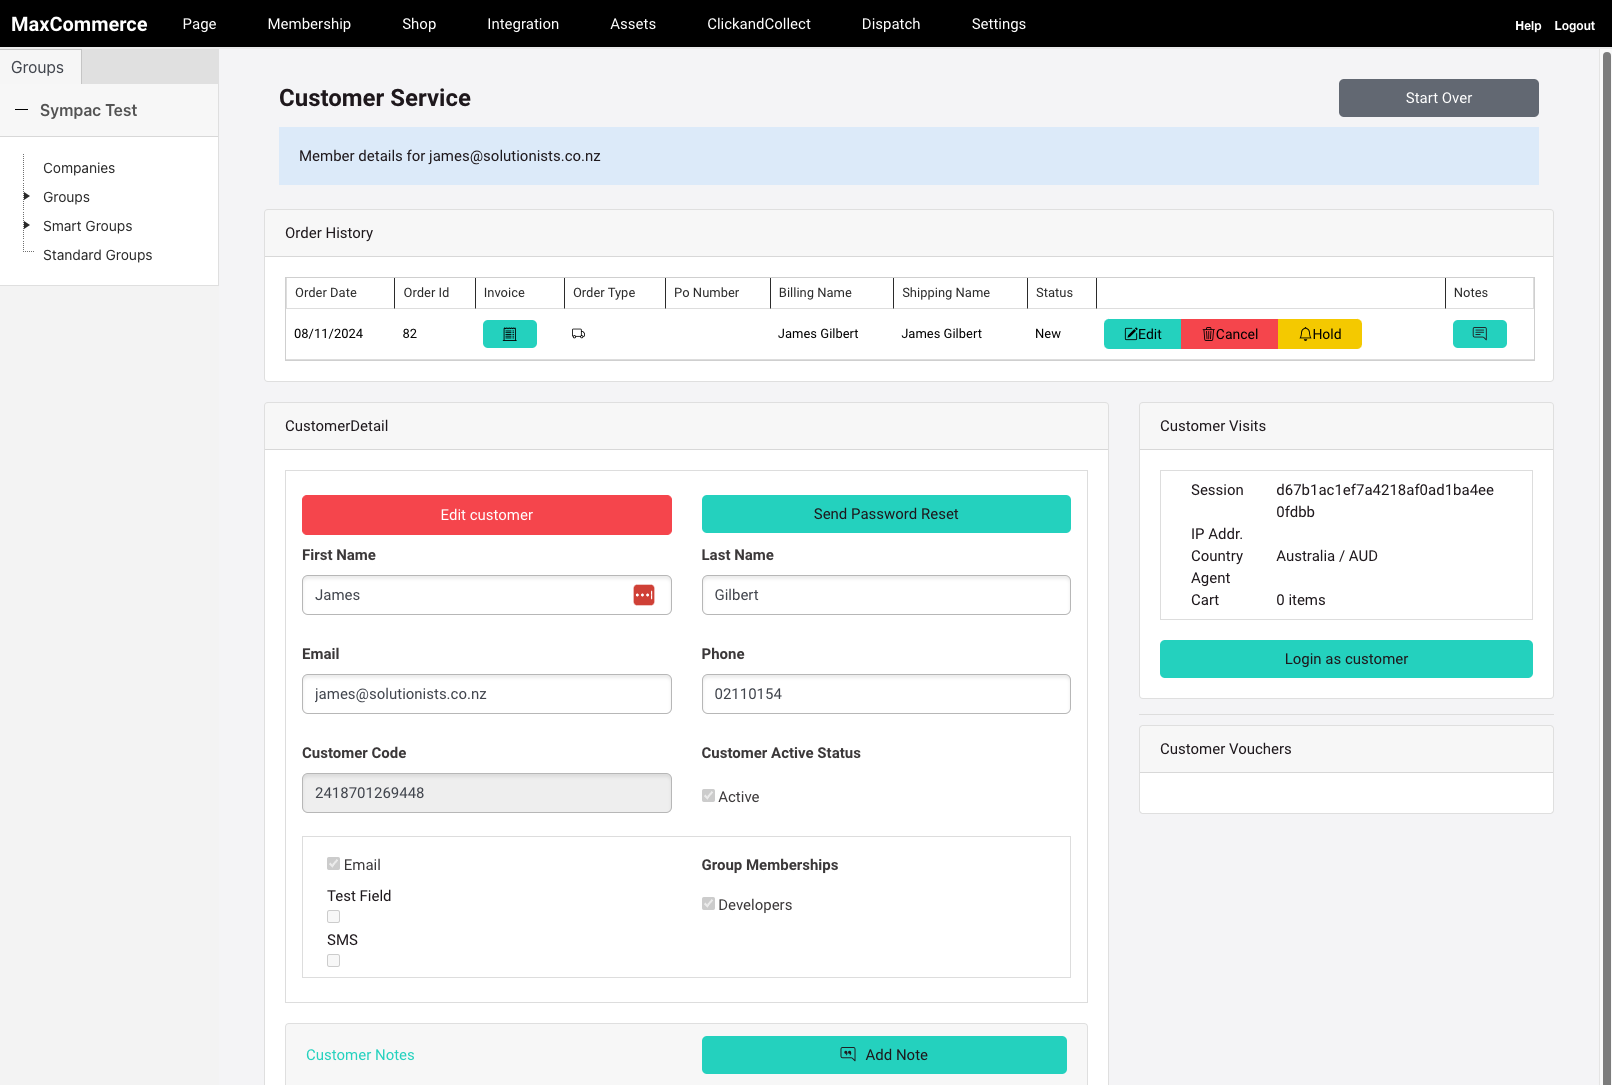
2. Check if a Member Already Exists
- Navigate to CMS > Members
- Search using the email address
- If a result is returned:
- Proceed to Step 3: Grant Admin Access
- If no result is returned:
- Proceed to Step 4: Add a New Member
3. Grant Admin Access to an Existing Member
- In the search results, click the member to open their profile
- Click Edit Member to open the Lightwindow
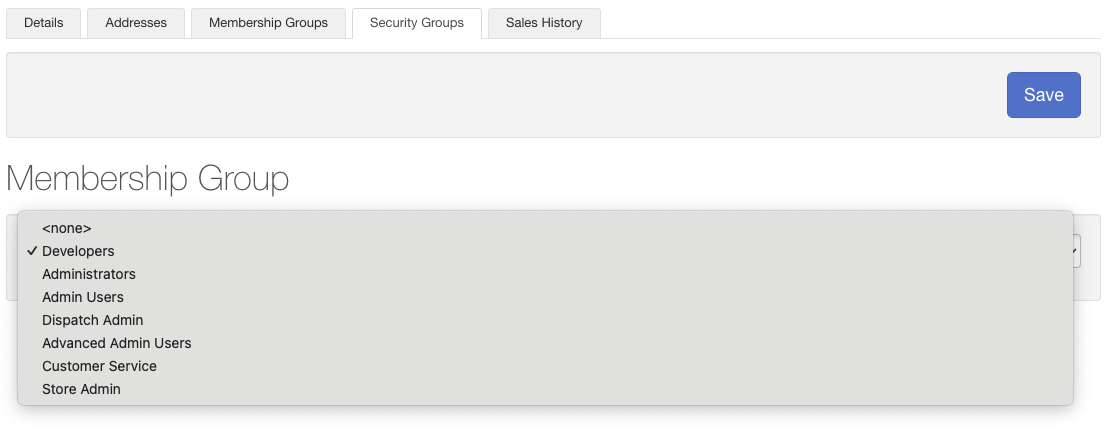
- Go to the Security Groups tab
- Select the appropriate admin group (e.g. Administrator)
- Click Save
The member now has CMS access using their existing login.
4. Add a New Member
You can either ask the user to create their account on the front-end or do it for them via the CMS.
Option 1: Member Self-Signup
- Ask the user to create an account from your website’s front-end (like a customer)
- Once created, follow Step 3 to assign them to an admin group
Option 2: Create Account via CMS
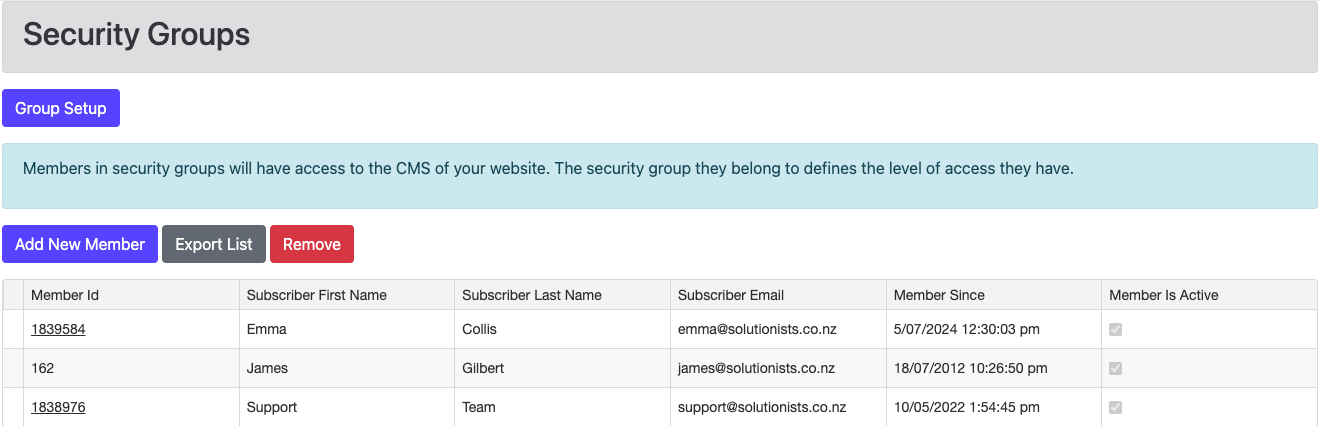
- Go to CMS > Settings > Security Groups > Administrators
- Click Add New Member
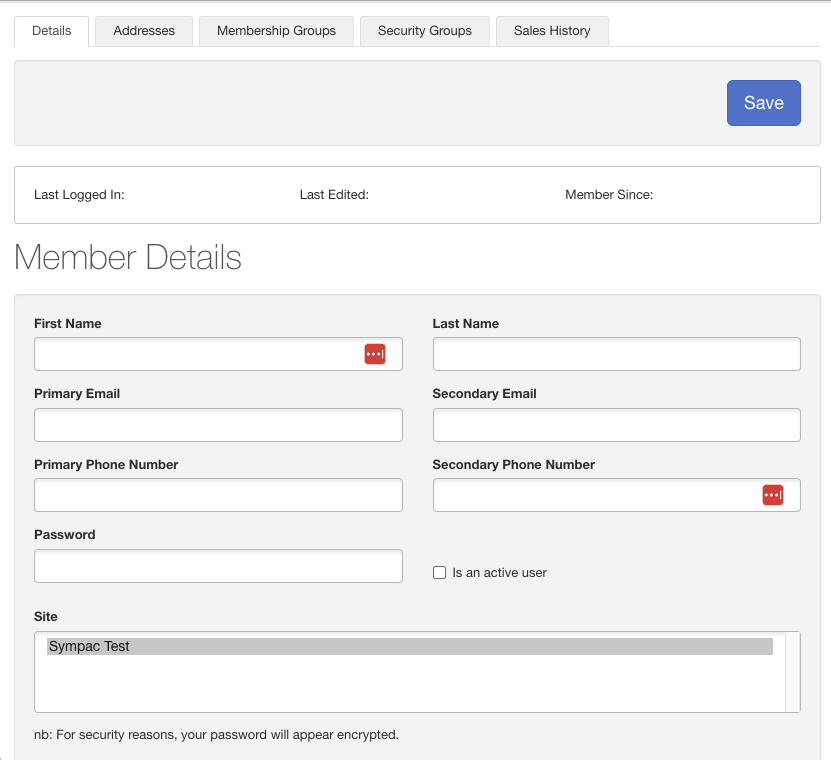
- In the lightwindow, enter:
- First Name
- Last Name
- Password (can be temporary; they'll reset it later)
- Tick Is an active user
- Ensure the correct site is selected
- Click Save
You may need to click the group (e.g., Administrator) again in the left-hand menu to reload the member list.
Send a Password Reset Email
- Go to CMS > Members
- Search for the new member
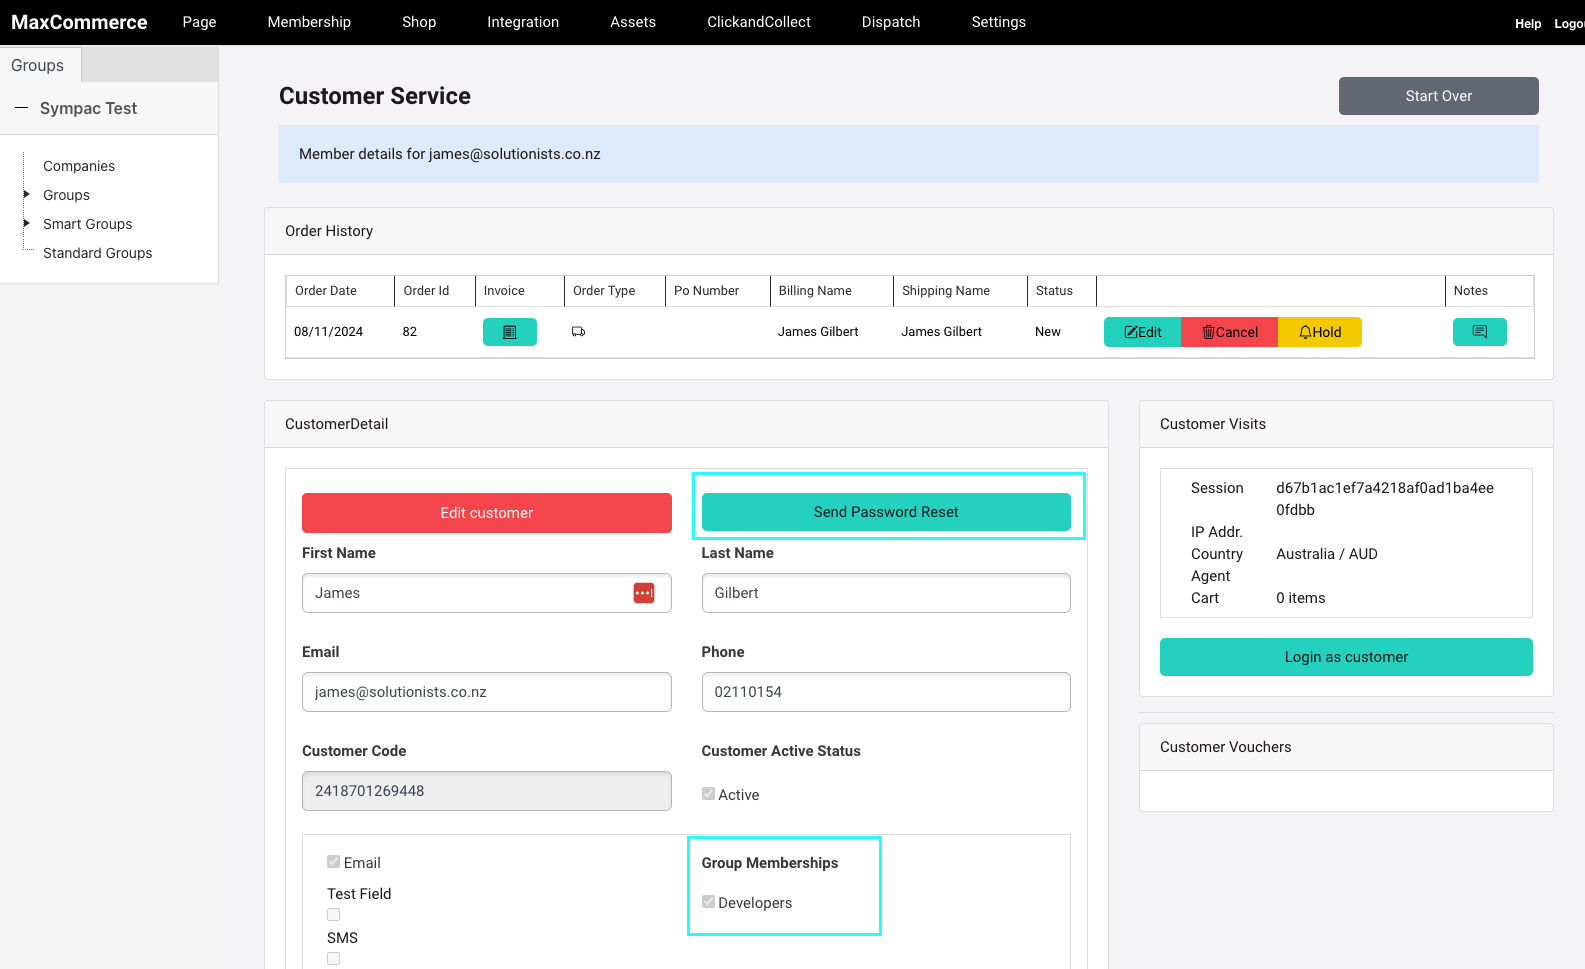
- Click their name to open the profile
- Click Send Reset Password
This will send a reset link to the email address entered.
5. Revoke Admin Access
If a team member no longer needs access:
- Go to CMS > Settings > Security Groups
- Click the relevant group
- Select the member from the list (highlighted in grey)
- Click Remove
This only removes their CMS access. The member account remains for order and reporting purposes.
Resetting a Password via the CMS
You can also manually reset a member’s password:
- Go to CMS > Members
- Locate and edit the member
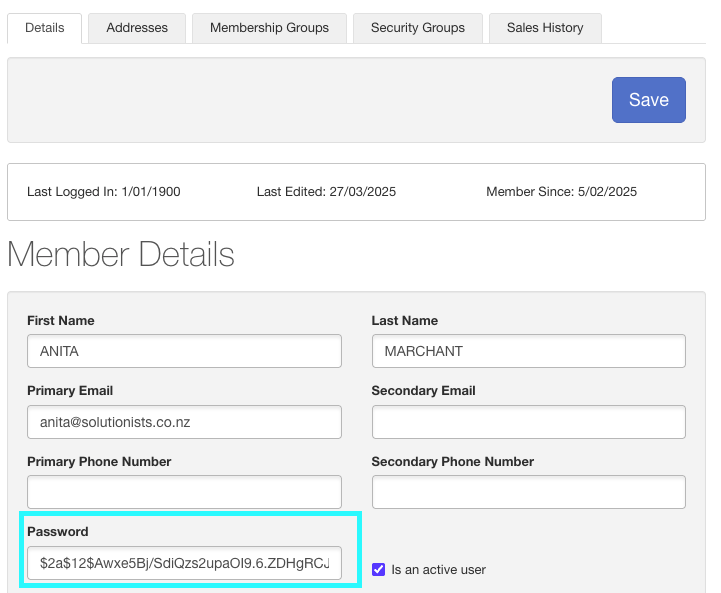
- In the Edit Member lightwindow, clear the encrypted password field
- Enter the new password and click Save
Tip: The password will always show as encrypted after saving, but the newly entered password will be applied immediately.