How to Log a Ticket
Ticket Info:
When logging a ticket in AutoTask it is important to add in all key information. This allows for quick and efficient triaging to take place. Meaning the appropriate resource can be allocated to your request instantly (depending upon the priority). It allows our team to spend time investigating the request rather than going back and forth for standard information which in turn is not cost effective for you.
We have outlined the key pieces of information below when logging a request in AutoTask. You can also use this as a starting point for your team internally.
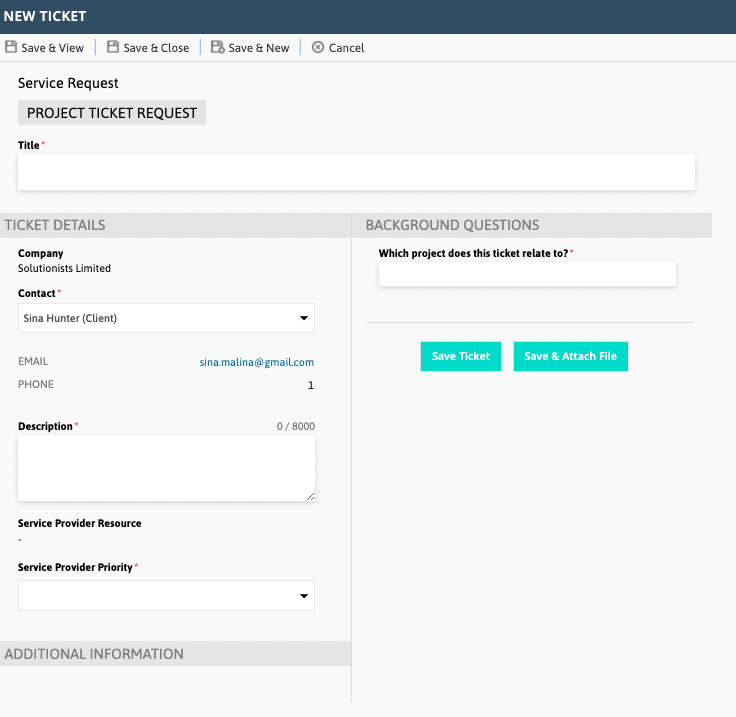
Request Type | Select ticket request type - either Existing Project or Support (see below for further details on) |
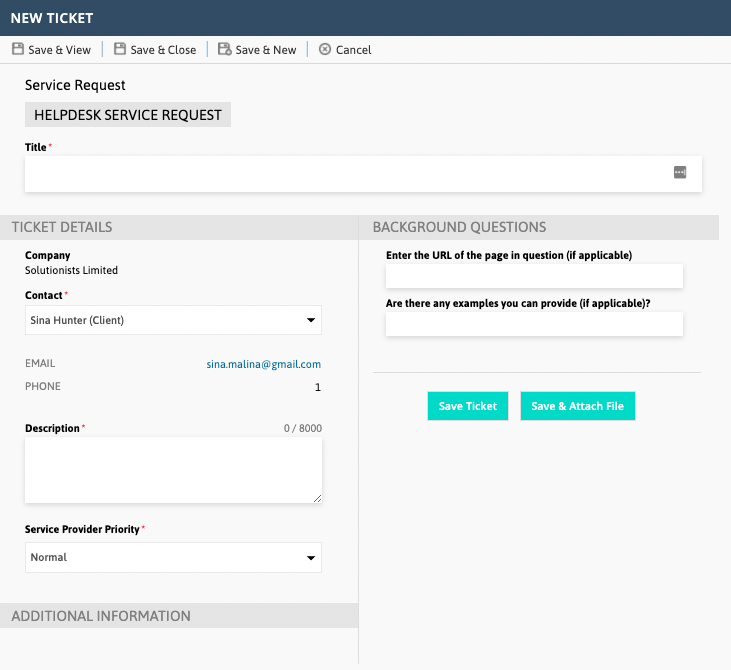
Title | This is a short description of the request itself. When entering try and make this as specific as possible Example: i.e. Change Main Navigation or Contact Us Form Submitting without all required fields entered or Product ABC Missing Product Image |
Description | Please detail step by step instructions for what your request is about. This is the only way that we can efficiently identify and action your requests. Example: Contact Us Form Submitting without all required fields 1. go to contact us form on www.mywebsite.co.nz/contact-us 2. Here you will see there are 4 required fields - Name + Description + Phone + Email 3. enter information into the below required fields - Name - Description - phone 3. Leave the email field empty 4. Click on the submit the form button 5. form is then submitted when it shouldn't be as the last required field 'email' was not entered. Form should not be submitted without the email field as it is a required field - please fix |
Service Provider Priority | Please assign an appropriate priority to your issues so we can prioritise the really important ones (you can review priority statuses here).
|
Enter the URL of the page in question | Enter the applicable URL of the relevant page into this field (this is a big time saver as it allows us to see exactly where you are). Example: www.mywebsite.co.nz/productabc_135 |
Are there any examples you can provide? | Add any specific examples to help speed up the review time. This could be product ID's or category pages or order iD's. Including items that are working and items that are to easily compare. |
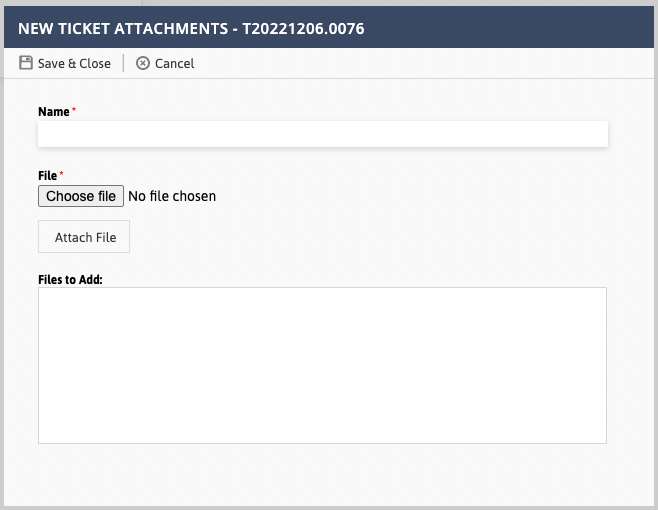
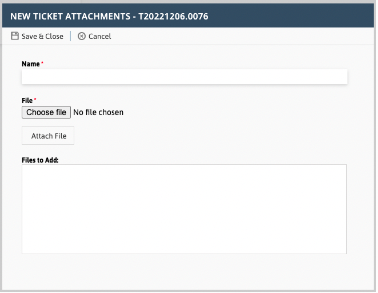
Screenshot or Document attached?(Save & Attach File) | Any key items relating to the request that can assist in completing the request For this field select if you have added an attachment. To add the attachment scroll down to the 'add documents' section. Example:
|
Types of Tickets:
There are two types of tickets you can log in Autotask.
Support Ticket
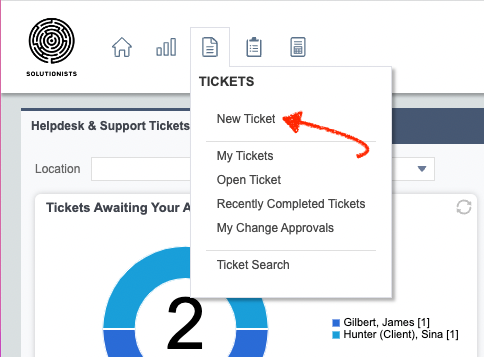
- To log a support ticket, hover over the menu item as below and click "New Ticket".
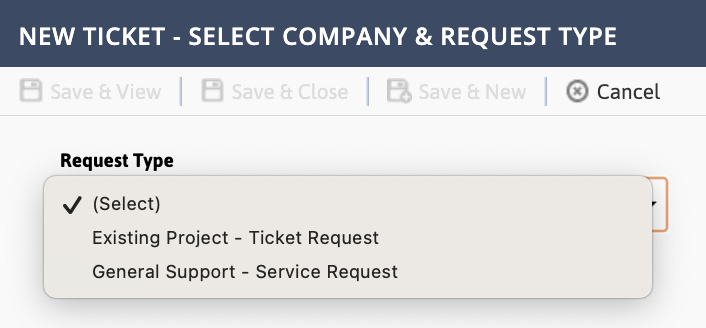
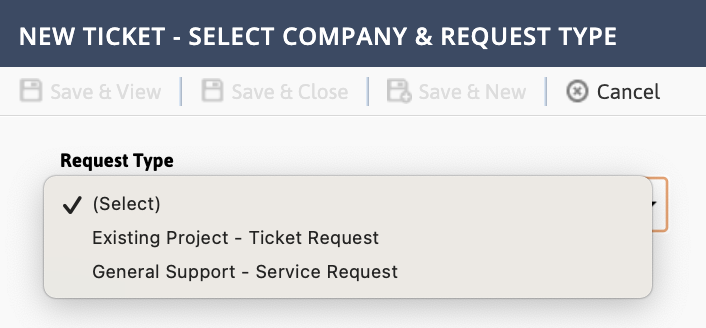
- This will open up a new window where you can select the request type. Select "General Support - Service Request".
- Continue to the detail screen. Add a title, description and any additional information against the background questions.
- You can Save Ticket to submit it, or you can Save & Attach File such as a screenshot.
- Our team will be notified when you submit a Helpdesk ticket. From here, we will triage the ticket.
Project Ticket
- To log a project ticket for an existing project, hover over the ticket menu item as above and click "New Ticket".
- This will open up a new window where you can select the request type. Select "Existing Project - Ticket Request".
- Continue to the detail screen. Add a title, description and add the project name against the background question.
- You can Save Ticket to submit your ticket, or you can Save & Attach File such as a screenshot.
- Your PM will be notified when you submit a Project ticket. From here, the project ticket will be triaged and associated with the corresponding project.