Getting Started
Autotask
Your Company Dashboard
How to log into Autotask
Autotask Overview
Navigating the Client Portal
How to Log a Ticket
Managing Your Tickets
How to enable Client Portal pop-ups in your browser
Ticket Report in Autotask
Statuses of Tickets
Priorities of Tickets
Shop
Content Management
Settings
Members
SEO
Overview of SEO
SEO for Images
SEO for Blogs
SEO for Pages
SEO for Shop Categories
SEO for Products
Google My Business Profile
Bulk SEO Management
New Website Builds
User Acceptance Testing (UAT)
UAT Overview
Placing Test Orders on UAT
Test Cases
Tips for Troubleshooting
UAT Feedback
Content Entry Checklist
Go Live Prep
Projects & Support
How to Change Product Images in the CMS 2026
How to Change Product Images in the CMS
Follow these steps to update a product image in the CMS:
1. Prepare Your Image
- Download or save the new product image to your computer.
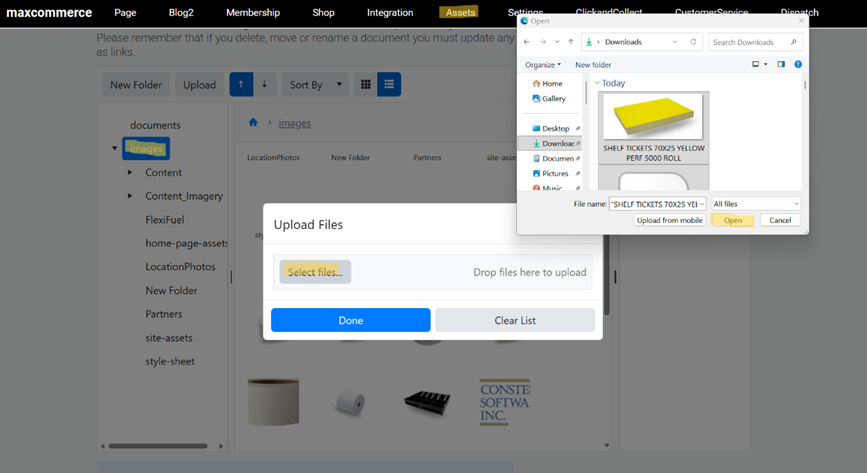
2. Upload the Image to CMS
- Log in to your company’s CMS portal.
- Navigate to Assets Tab
- Upload the image from your computer into the CMS file manager.
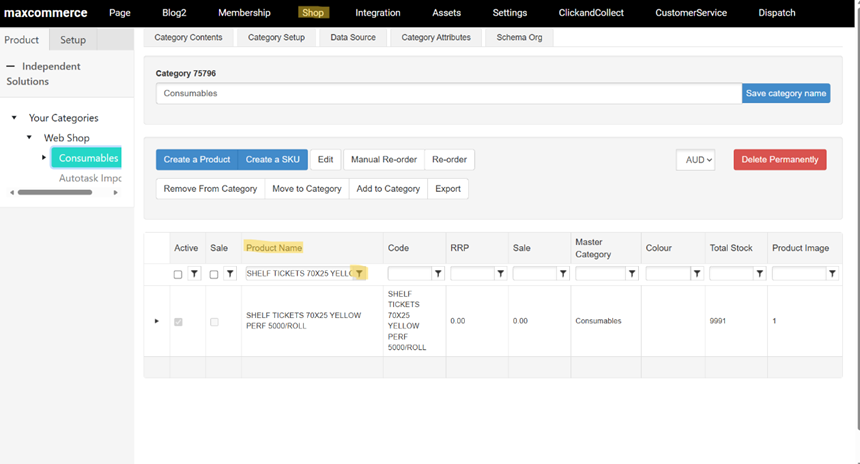
3. Locate the Product
- Go to Shop.
- Use the Product Name column to search:
- Paste the product name into the filter.
- Set the filter to Contains to make it easier to find.
- Ensure you are in the correct category.
4. Edit the Product
- Double-click the product row to open the Product Setup screen.
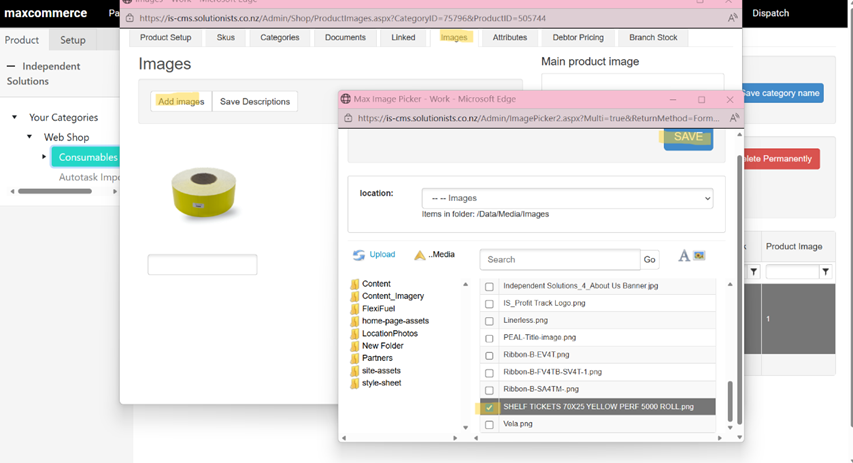
- Select the Image tab.
5. Update the Image
- Click Add Images.
- Locate and select the newly uploaded image from the CMS.
- Remove the old image you want to replace.
6. Save Changes
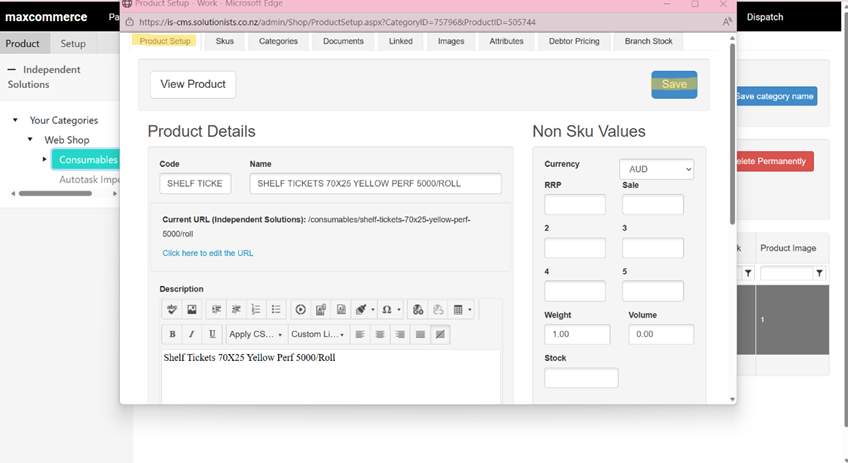
- Go back to the Product Setup tab.
- Click Save to apply your changes.